What you need before you start
You need an active Shopify store with some existing content. Products, collections, an About page. Brandini reads this content to learn how your brand communicates, so the more you have, the better your voice profile will be.
No technical skills or writing experience required. If you can click a button and fill in a text field, you can generate a blog post.
Step 1: Install Brandini from the Shopify App Store
Search for "Brandini" in the Shopify App Store, or navigate directly to the listing. Click Add app, then authorize Brandini to access your store data. The app needs read access to your products, collections, and pages so it can analyze your brand voice.
Brandini's free plan includes everything you need to follow this tutorial. No credit card required.
Step 2: Extract your brand voice
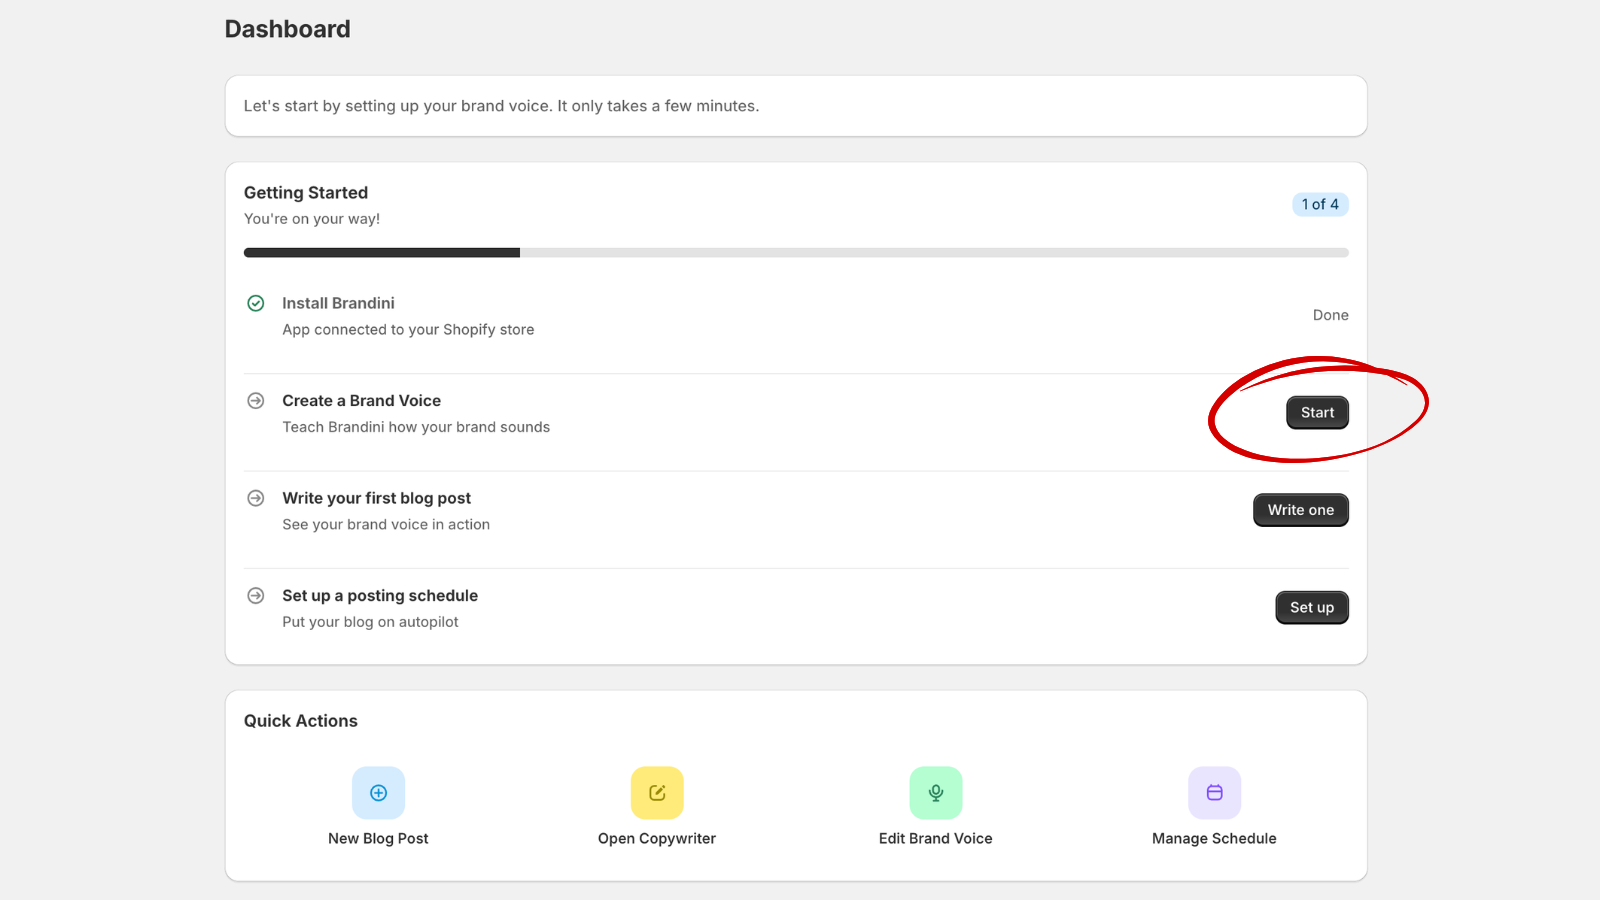
When you first open Brandini, you'll see a prompt to create your brand voice. Click Create Brand Voice to start the extraction process.
Brandini reads your products, collections, and pages, then generates a voice profile that captures your brand's tone, formality level, preferred phrases, and writing rules. This takes about 30 to 60 seconds.
Why voice extraction matters
Without a voice profile, AI-generated content sounds generic and interchangeable. Voice extraction is the first stage of Brandini's multi-step content pipeline, and it's what separates brand-specific content from the template-style posts that most AI tools produce.
Step 3: Navigate to Blog and create a new post
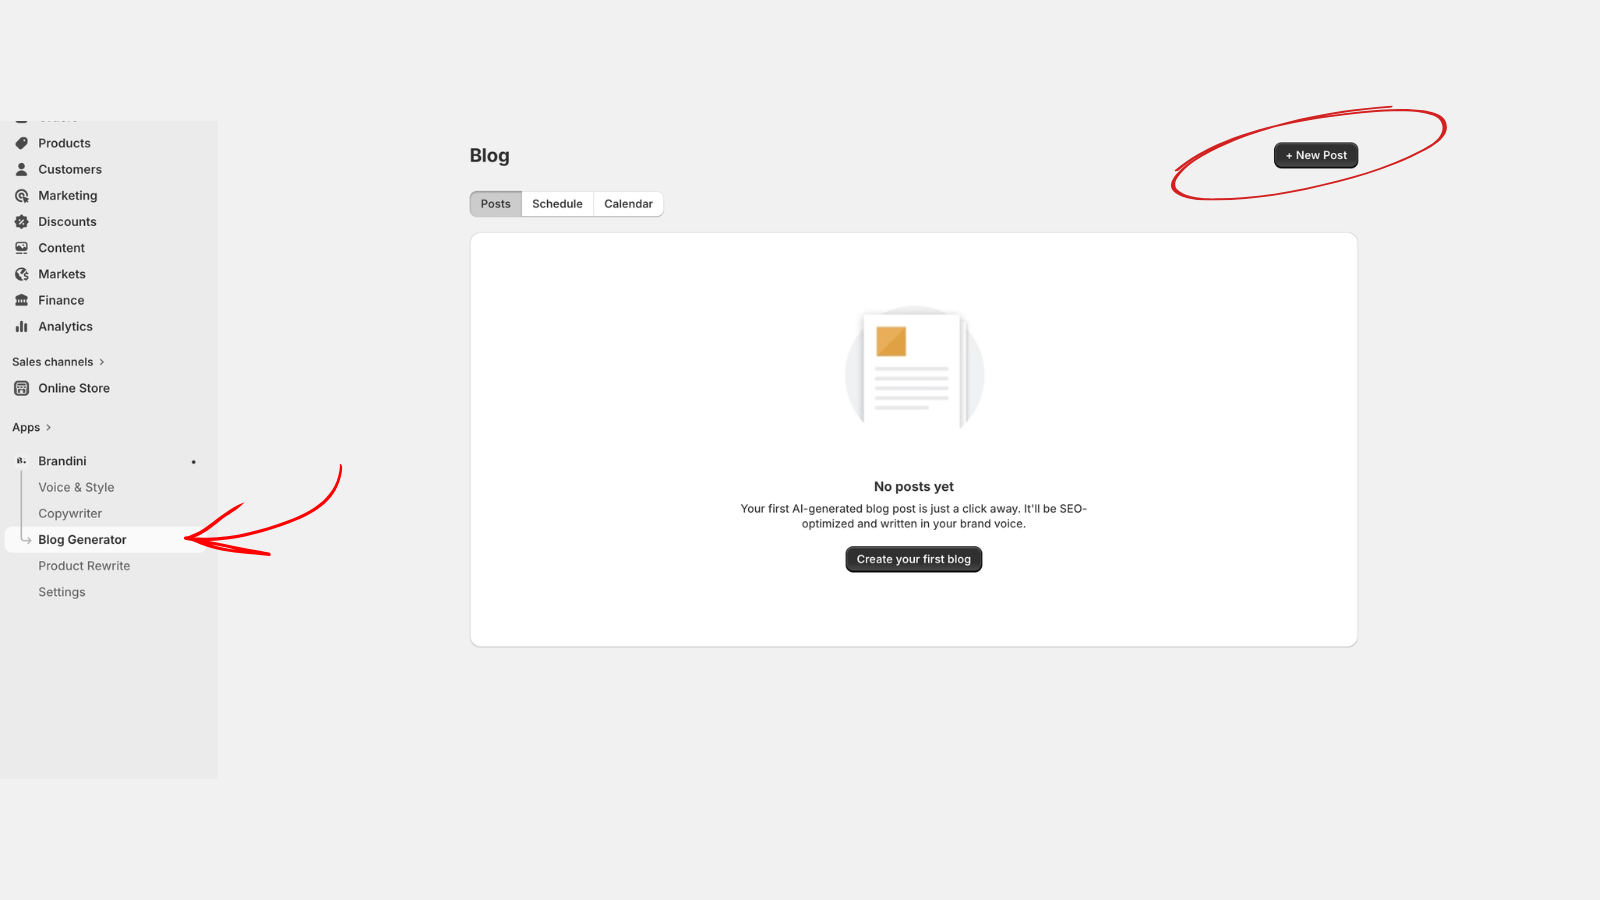
In the Brandini sidebar, click Blog. You'll land on the Posts tab, which shows any existing blog posts synced from your Shopify store. Click the + New Post button in the top right corner.
You'll also notice Schedule and Calendar tabs here. Those are for setting up autopilot publishing later, but for now, we're focused on creating a single post.
Step 4: Choose a topic
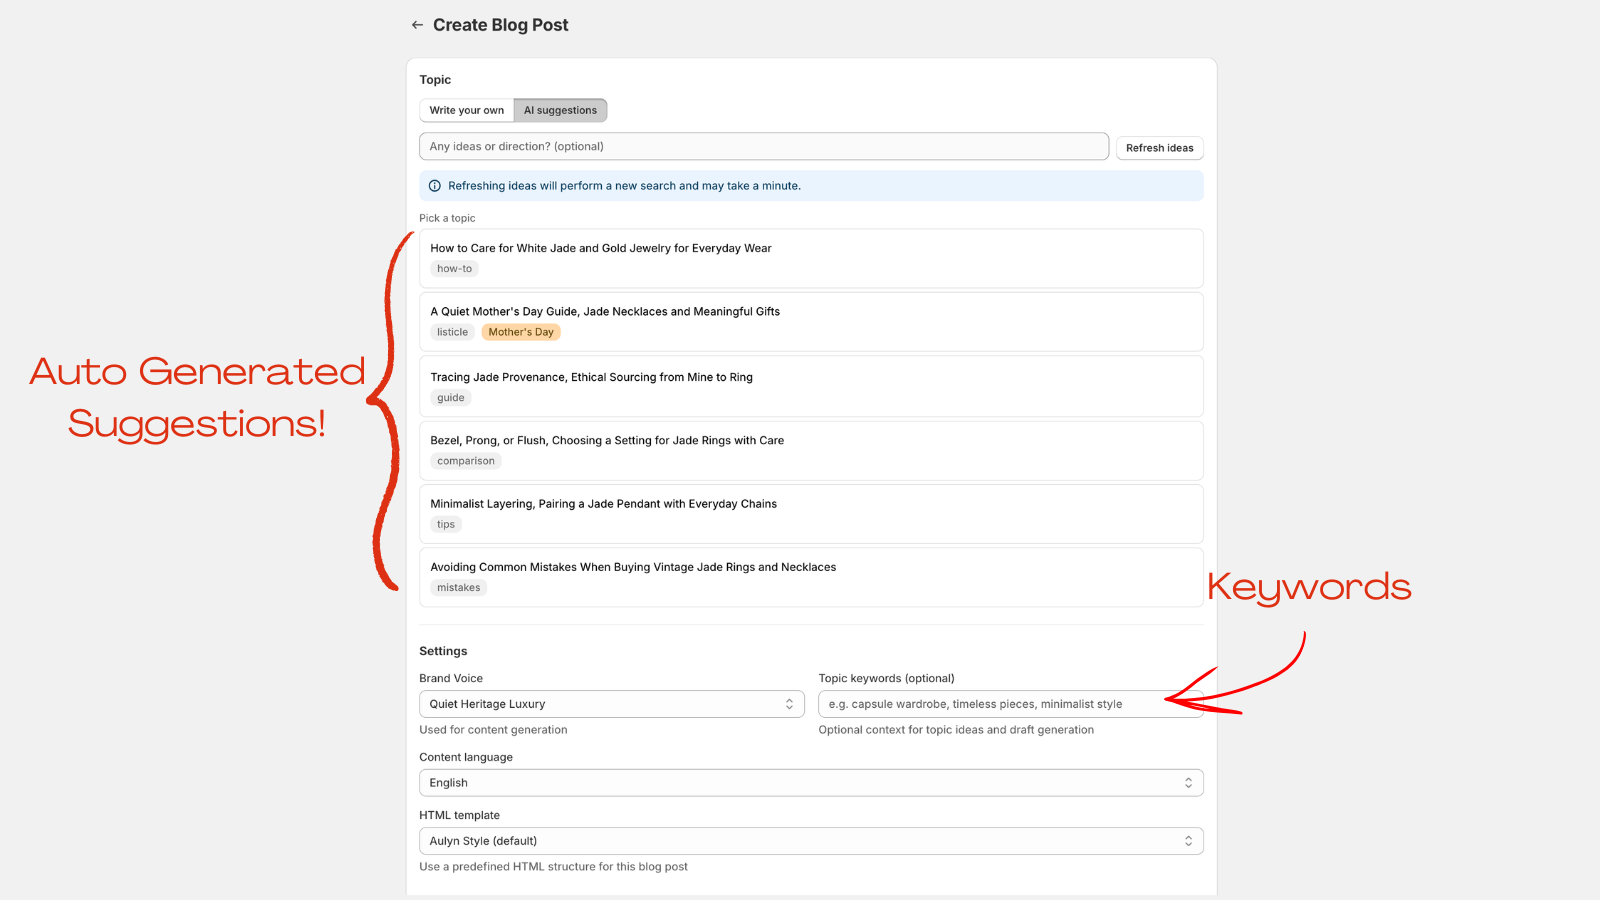
The new post form gives you two ways to pick a topic:
- Write your own. Type a topic directly if you already know what you want to write about.
- AI suggestions. Click the suggestions button and Brandini generates six topic ideas tailored to your store, complete with format and seasonality badges. Click any suggestion to select it.
If you want to steer the AI's direction, add optional seed text describing what angle or audience you have in mind. For your first post, the AI suggestions are a great starting point.
Step 5: Configure your post settings
Below the topic field, you'll find a few settings to fine-tune your post:
- Voice profile. Auto-selected based on the voice you extracted in Step 2. If you have multiple profiles, pick the one that fits this post.
- Keywords. Add target SEO keywords you want the post to rank for. Brandini weaves these into the content naturally during its refinement pass.
- Content language. Choose the language for the generated post. Defaults to your store's language setting.
- HTML template. Select a layout template if you have custom blog templates in your Shopify theme.
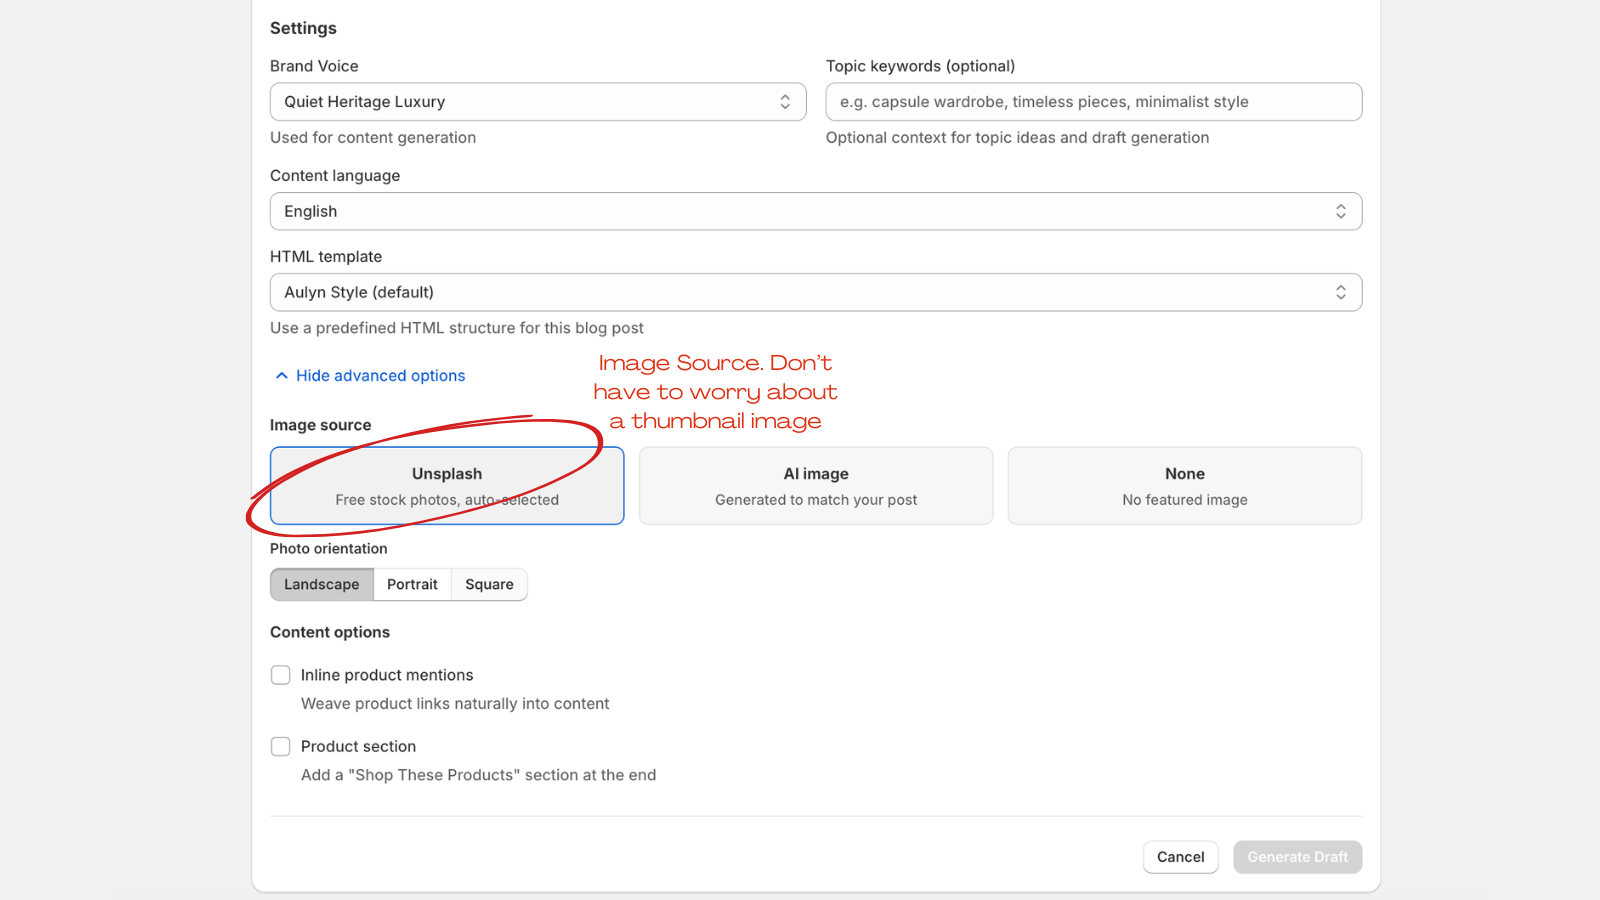
Step 6: Explore advanced options (optional)
Expand the advanced options section to see additional controls:
- Image source. Choose between Unsplash photos, AI-generated images, or no image.
- Inline product links. Automatically link relevant products from your catalog within the blog post.
- Spotlight products. Feature specific products prominently in the post content.
For your first post, the defaults work well. You can experiment with these options on future posts once you see how the basic generation works.
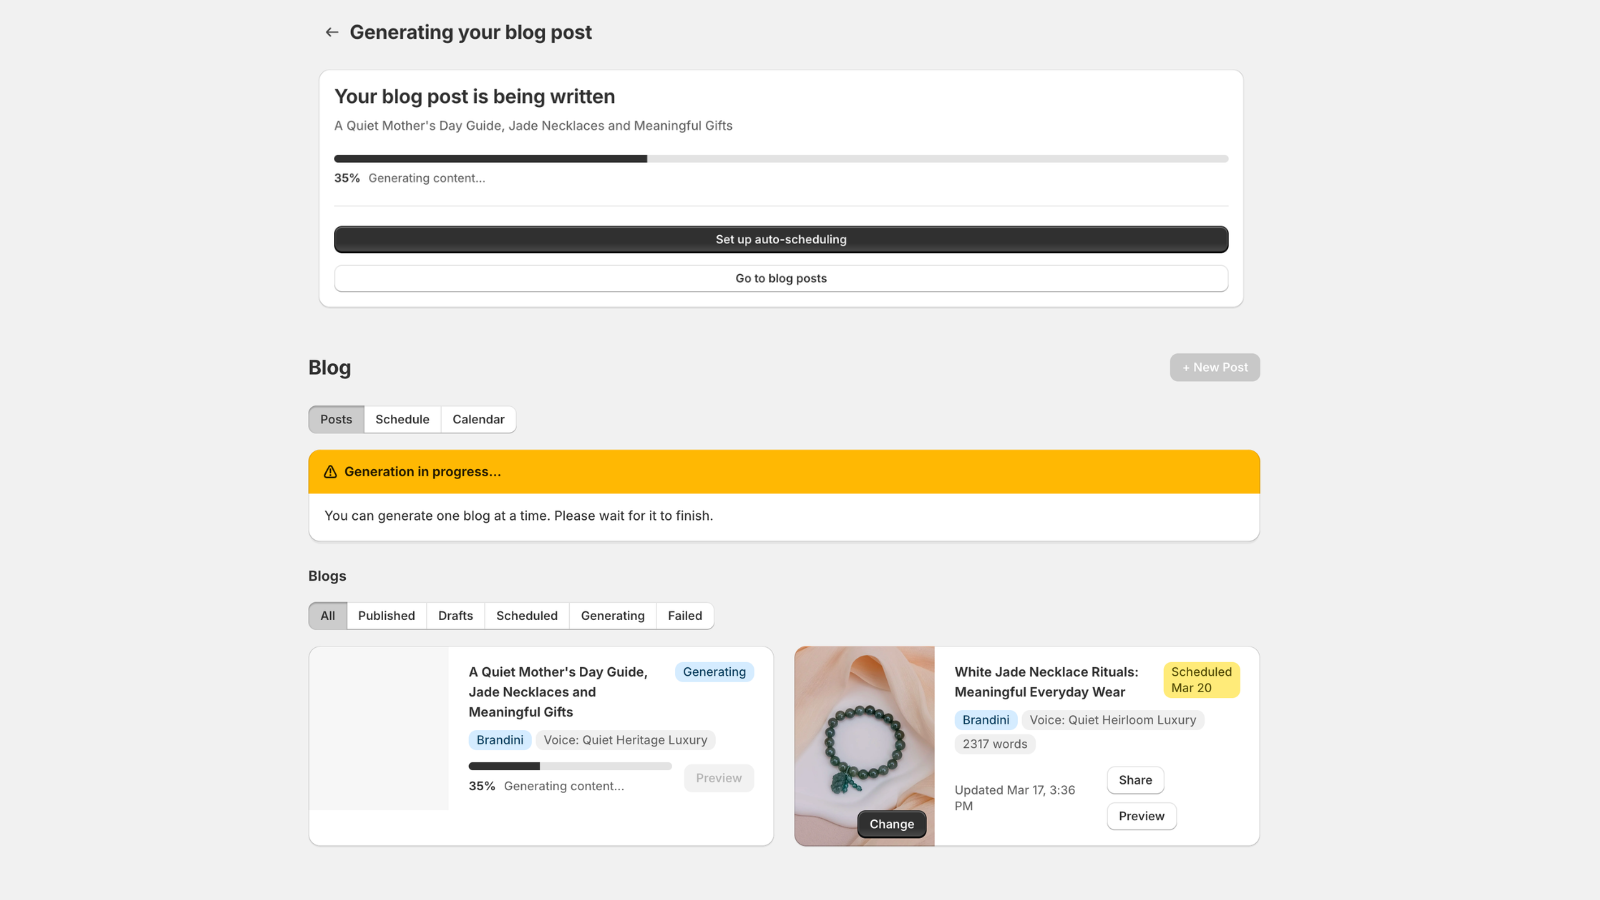
Step 7: Generate your blog post
Click Generate Draft. A progress bar appears showing each stage of the pipeline: drafting the content, refining for voice and SEO, sourcing a cover image, creating the article in Shopify, and generating social captions.
The full process takes 30 to 90 seconds depending on the post length and image source. You can navigate away from the page and come back later. The post will be waiting for you when it's done.
If you're curious about what happens during each stage, the pipeline explainer post breaks down the full generation process in detail.
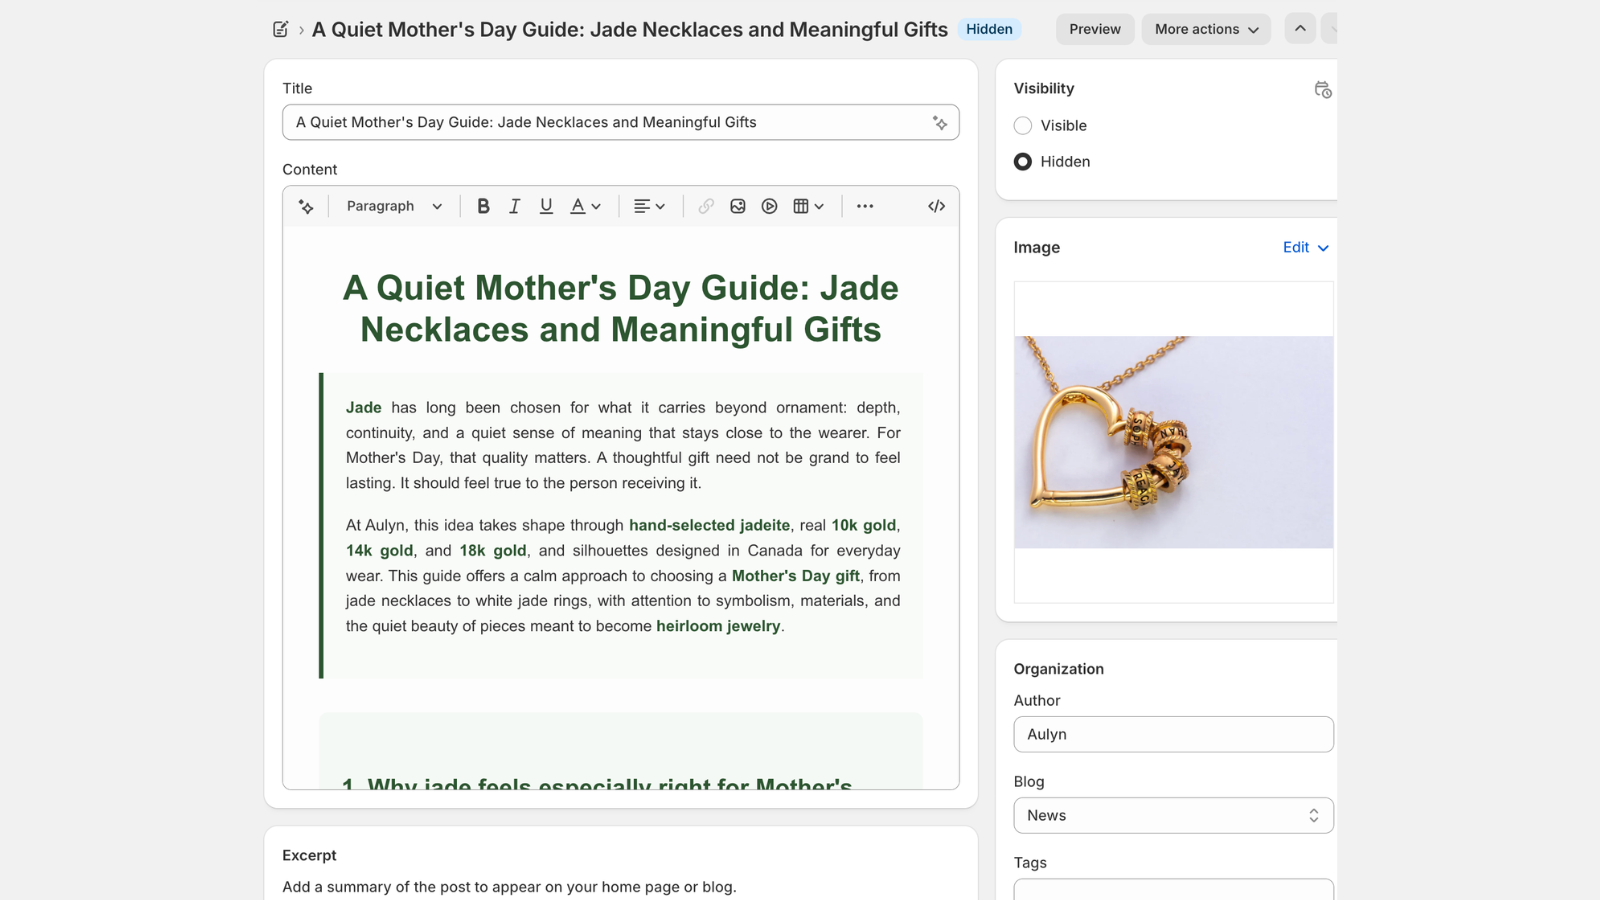
Step 8: Review, edit, and publish
Once generation is complete, your new post appears in the blog list with a Draft badge. Every generated post starts as a draft so you can review it before it goes live.
From here you have a few options:
- Edit in Shopify. Click this button to open the post in Shopify's standard blog editor, where you can make any final tweaks to the content, images, or SEO fields.
- Publish now. If the draft looks good as-is, publish it directly from Brandini or from the Shopify editor.
What to do after your first post
You've got your first AI-generated blog post live on your Shopify store. Here's what to try next:
- Set up a schedule. Brandini's autopilot mode can publish posts on a recurring cadence. Head to the Schedule tab in Blog to configure it.
- Try product description rewrites. Brandini can also rewrite your product descriptions using the same voice profile. Check the Products section in the sidebar.
- Refine your voice profile. Read through your first post and note anything that doesn't sound right. You can edit your voice profile's rules and phrases to improve future generations.
If your first post sounds a little too generic, don't worry. That usually means your voice profile needs more data to work with. Add more content to your store, refine the profile, and the next post will be closer to your brand's actual voice. For more on why this happens and how to fix it, read why AI blog posts all sound the same.